Plugins in Dynamics 365 : Part 5
Hello Guys,
Here you can see we have used Organization Service which represents a connection to Dynamics. You can initialize this using service provider parameter.
In my previous blogs i have shown how to register plugin for update message.Today we will see how to implement tracing in plugin also we will see Pre-operation stage. But before if you are new to our blog then do follow us to know more about Dynamics and Power Platform. Also if you like our blog then please comment and share this blog with your friends.
As being a developer, while developing plugin we need to ensure that our plugin is running as expected and it should not contains any errors. However whenever our application giving any error, we try to resolve it by debugging the application. Debugging a plugin in CRM is quite different and we will see how we can debug a plugin in our upcoming blogs.
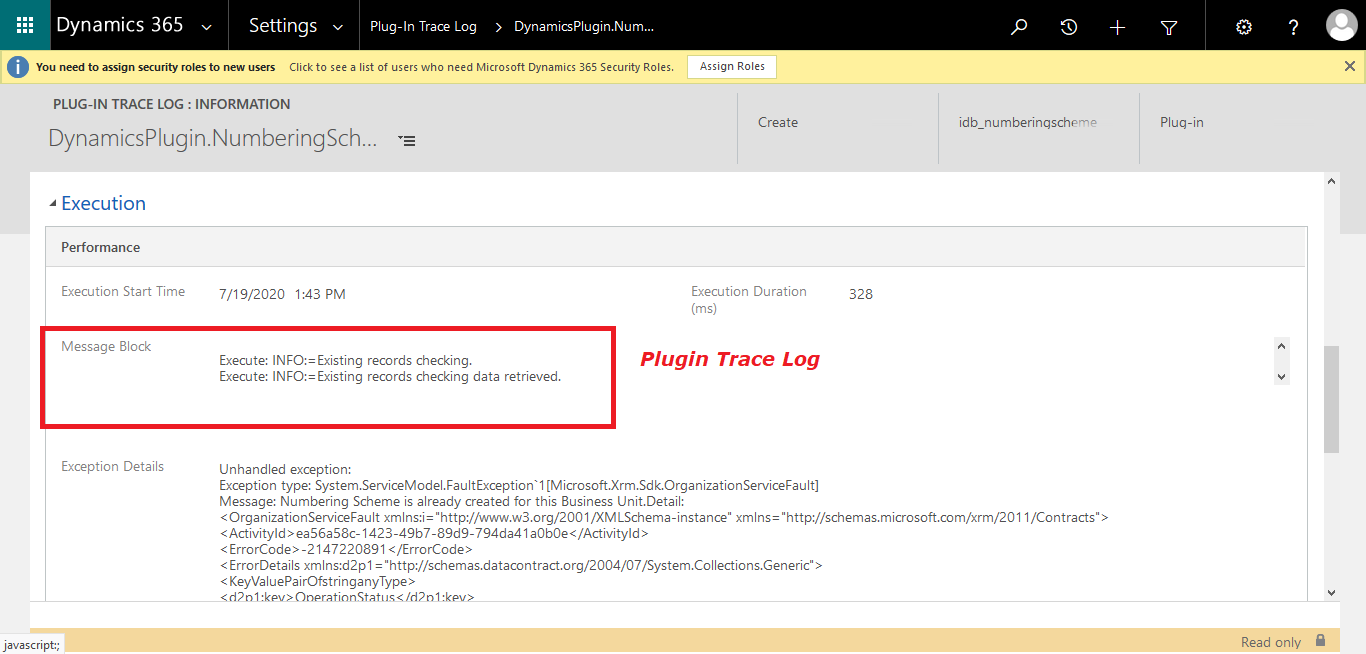
Now here we need to ensure our plugin is running as expected and that is without debugging. In this scenario we can implement tracing for logging the trace. The Plugin Trace Log feature keeps the trace log information in D365 which is slimier to the information you get when plugin throws an exception. One best thing about the Tracing is that trace log information will be available even the plugin does not throw an exception. To enable tracing we need to follow below steps:
Step 1:- Login to Dynamics CRM and click on Advance settings icon gear. You will see below window.
Step 2:-Navigate to Settings -> Administrator ->System Settings -> Click on Customization Tab -> Plugin and Custom workflow activity Tracing -> Select All -> Ok.
Step 3:- Now open DynamicsPlugin project in visual studio. Right click on project and add a new .cs file named "LogTracer". Replace the existing code with below one.
Here you can see we have used "ITracingService" interface which provides Trace method to trace the logs in CRM. Now we will be creating a new entity named "NumberingScheme" which will keep the tracks of Numbering Scheme for Business Unit. We are having below Business unit.
We will be creating new entity with below fields.
Business Unit -> Lookup
Business Unit Short Name -> Text(Single line)
Prefix -> Text(Single line)
Count -> Whole Number.
For time being i have created this entity. Now we will be adding a new .cs file named "NumberingSchemeValidation" which will validate duplication of BU while creating a new record. It means we need to validate that user can not use same BU if it is already used in previous numbering scheme.
Step 4:- Replace the existing code with below one.
Also here we are using query expression for retrieving existing records which means we are making a database transaction and that is why we will register this plugin on Pre-Operation.
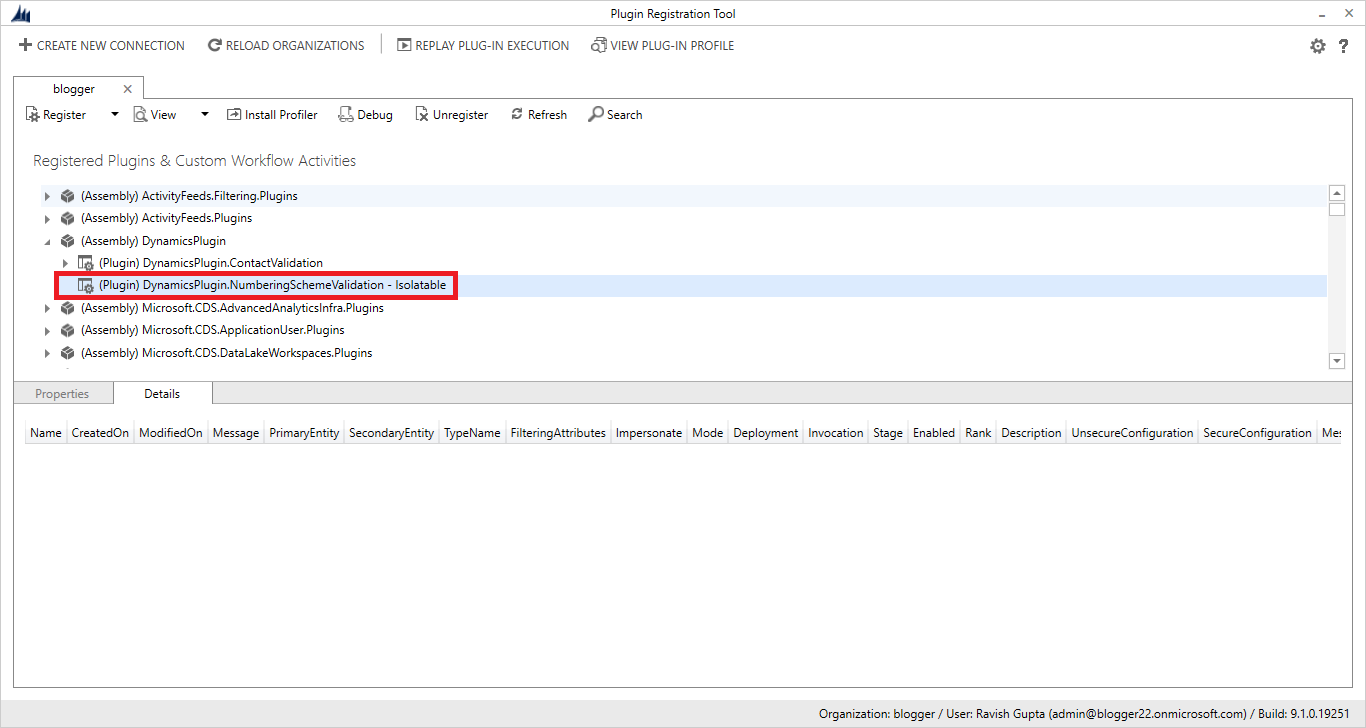
Step 5:- Build the project and Open Plugin registration tool.
Step 6:- Click on Update. Specify the assembly path.
Step 7:- Now we will be creating plugin step for Numbering Scheme Entity. Right click on NumberingSchemeValidation and click on Register new step. Fill below details.
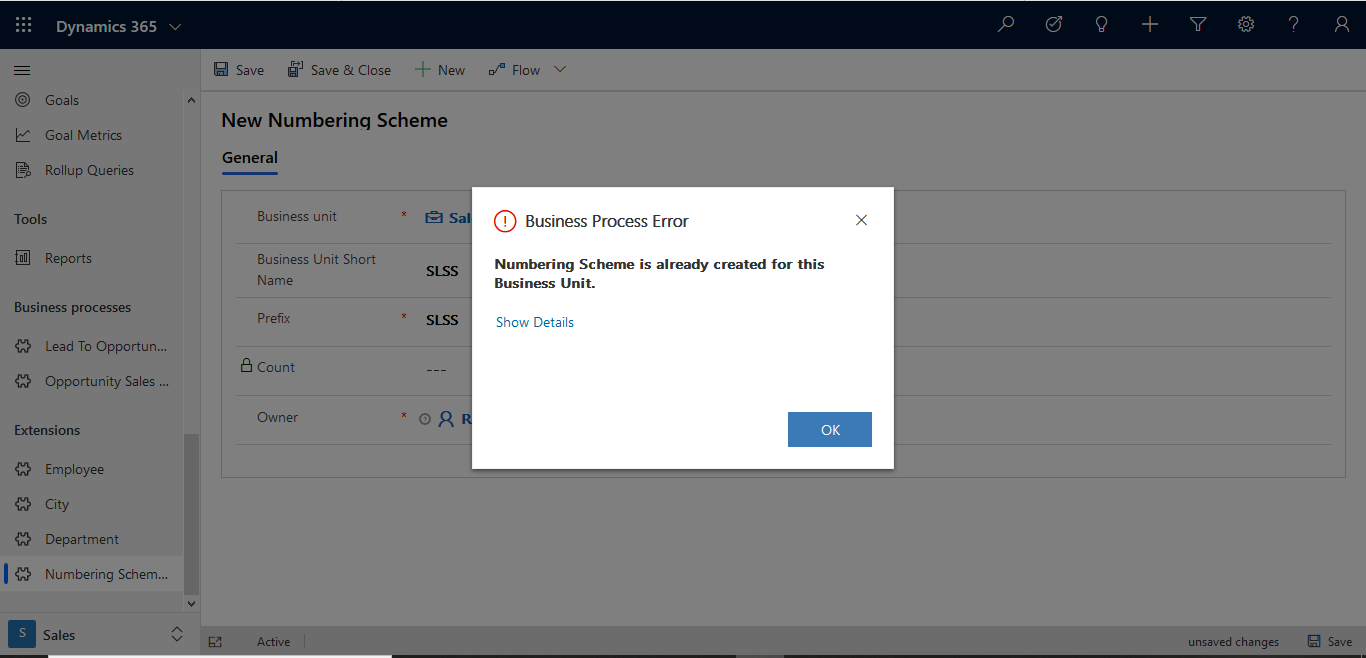
Now we will create a new record in numbering scheme and will check the validation.
Once you are able to create numbering scheme record you can check trace logs which are kept by CRM. Click on Settings -> Plug in Trace Log.
Hope it helps...


👍
ReplyDeleteThanks
DeleteVery good article, but for some reason images are not downloading in any of your post, Could you please let me know how can i see images in you website.
ReplyDeleteThanks for your comment. however you might be facing internet issue. you can open this blog using any browser(Google chrome is best) and can open images by clicking on it. Kindly follow and subscribe for more upcoming post.
Delete👍
ReplyDelete👍
ReplyDelete